Lego Kelvin Water Dropper
A Water Powered Electrostatic Generator
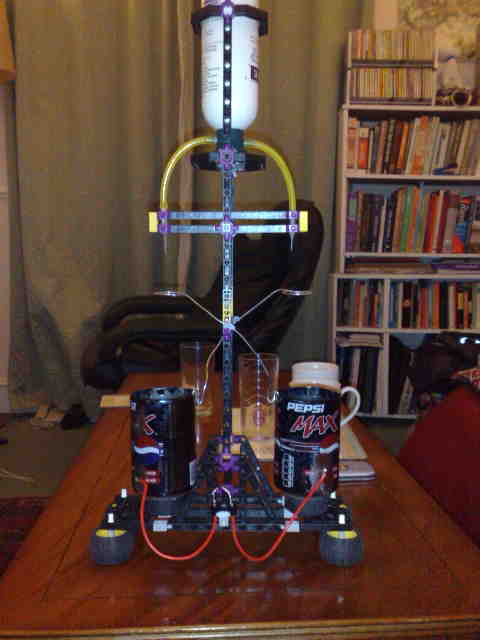
While writing the section on electrostatic machines I thought it would be fun to try and build my own Kelvin water dropper. I drew a few sketches of how it might come together and then I remembered that I had some Lego stuffed in a draw and I thought that maybe there would be enough to build the device. Lego is good for the structural components because it is easily adaptable and it is also an insulator. Other parts used in the construction were found around the house including a plastic bottle which used to contain Aussie Mega Shampoo, which was just the right size to fit the Lego tank holder. I also scavenged some silicone fuel-tubing from a old RC aircraft fuel tank, steel drinks cans and steel gardening-wire. The operation of the machine is described in the section on electrostatic machines
Incitor Rings
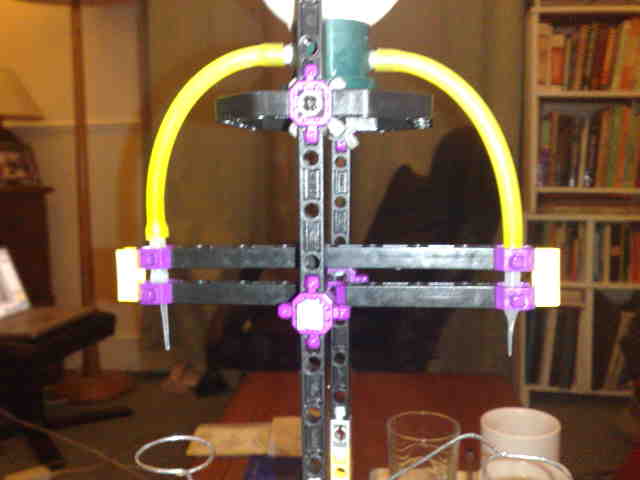
Finally, the rings. Originally, I was going to use old aluminium pie dishes for these parts but when I tried to cut a hole in the centre, the Aluminium foil tore and created sharp edges which would probably been a source of corona discharge.
Next, I tried rings made cut from the walls of another drinks can. However these also had sharp edges. Eventually, I settled on a stiff piano wire which was bent and soldered to form a ring. The advantage of this was that the wire was also structural being strong enough to hold the rings in the desired position.
Water Droppers
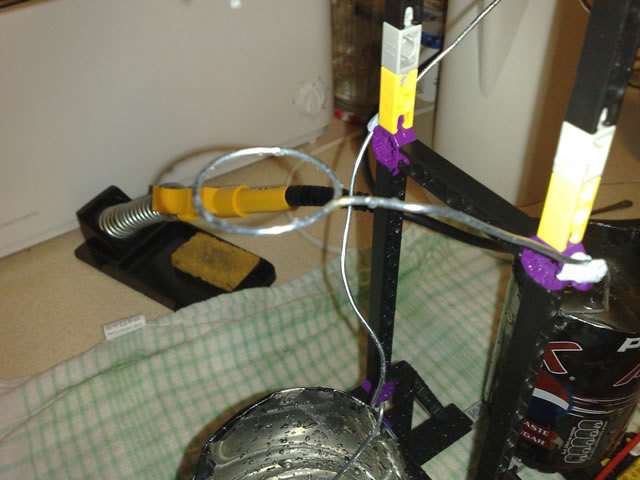
The droppers were scavenged from a packet of super glue and inserted into the fuel tubing. These provided very good rate of flow of water and well formed drops but there is considerable variation in the diameter of the ends of the tubes, leading to drops flowing at different rates. A better solution would be to use hypodermic needles for the droppers but these were not available at the time of building.
Charge Containers
The charge containers deserve particular attention as they required a lot of experimenting with before they worked. The surface of the can contains the charge that builds up drop by drop. The paint must be removed from the surface where the wires that form the spark gap collect the charge. Also the top of the cans must be bent into the can leaving a rounded edge to the top of the can rather than the razor sharp edges of the can which remain when the top is cut off.
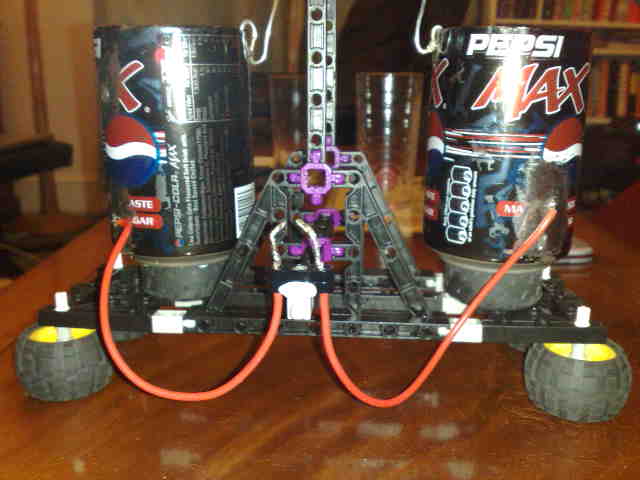
The cans must be well insulated and this was insured by placing the entire platform on rubber tyres and then further insulating them from the platform using another set of rubber tyres which by happy accident fit into the recess at the bottom of the cans. The cans are secured from falling over by the addition of Blue Tac. (No respectable experiment can be considered complete without the use of either Blue Tac or Duck Tape.)
Sparking
The flow of water starts off as a steady stream of fast flowing droplets slowly becomes more charged and repels the other water drops causing the stream of water to spread out past the incitor rings and even fly upwards. With a breakdown voltage of 33,000 V cm-1 at standard temperature and pressure, with a spark gap of around 5 mm, this estimates the voltage at some 16,500 V across the spark gap. Of course the current is minute and hence the power output is really quite low and not dangerous.
Troubleshooting
If you decide to build a Kelvin water dropper and it does not work then I can offer the following advice:
- The charge collecting cans need to be isolated from the Earth and if quite often the base can become wet when adjusting the droppers which can prevent the spark occuring.
- The spark gap needs to be carefully adjusted otherwise corona discharge will cause the charge to leak away at the sharp edges of the device. Try a smaller gap before opening it wider.
- The incitor rings need to be placed at a level such that they are just below the forming droplets of water in order to start the charging process in the beginning.
- The solder can be filed down to avoid any sharp points on the cans which can cause the charge to escape.
